Raspberry Pi Zero W as a headless time-lapse camera
Raspberry Pi Zero W as a headless time-lapse camera
tl;dr: There are many ways to capture time-lapse videos. But this one is cheap, completely wireless, and mine. If you want to skip the post and go straight for the glory, grab a copy of my Time-lapse app for the Raspberry Pi.
Time-lapses transform subtle, slow processes into something beautiful, and often make us think about things in new ways. For example, have you ever thought about just how heavy a wet snow is? The trees in your yard might know a thing or two about that! Check out a time-lapse I recorded this morning some mighty oak tree branches, as they relaxed upward as if in relief from the wet snow falling off:
Quality time-lapse photography used to require expensive equipment special knowledge, so it remained the domain of the specialist. Fast forward to 2017, and we have a $10 computer and a $30 camera that can create a wireless time-lapse device that can produce footage in any modern resolution—even up to 4K! Sure there are many cameras with built in intervalometers and lenses you can use to make more creative images... but would you be willing to leave your expensive equipment in places or situations where you risk damaging them? $50 of equipment, maybe... $1000+, no way! (At least, not for fun and exploration.)
The Raspberry Pi has freed me to think in new directions for computing (for example, check out my Raspberry Pi Dramble project), and it's also allowing me to expand my photography horizons. And if you want to tinker as well, all you need is this little guy:
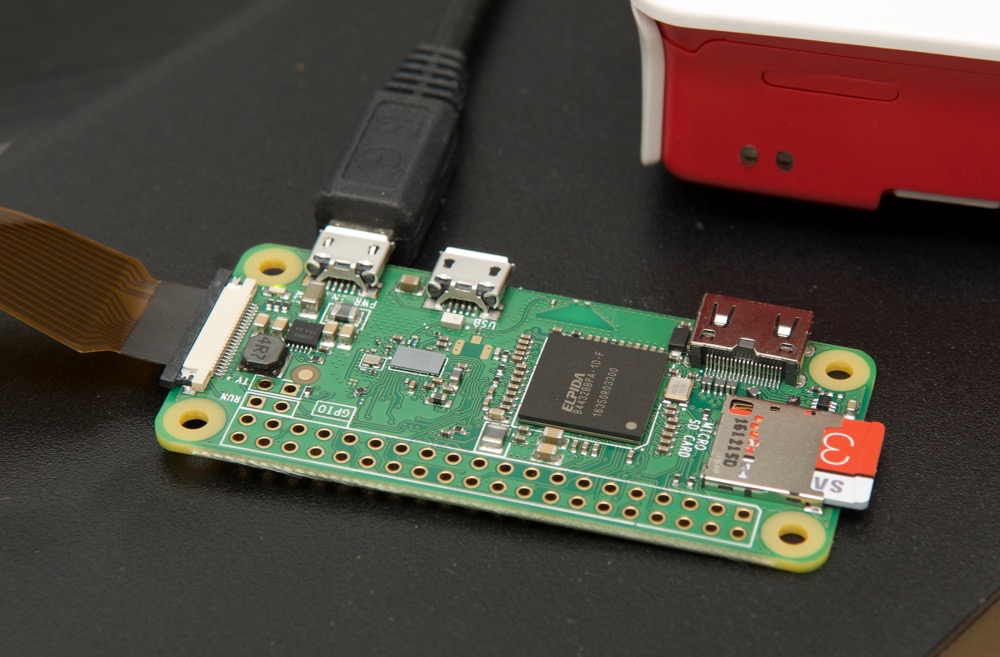
The Raspberry Pi Zero W.
For this year's Pi Day (3.14), I decided to grab a Raspberry Pi Zero W from Micro Center, write up a small app, and record time-lapses. And I've decided to open source all my work, and share this blog post so you, too, can enjoy watching life in fast-forward!
Requirements
There are some programs you can download that are more automated, but (a) they usually require the use of a keyboard and monitor (which we don't want to use), and (b) they usually consume more power (meaning less battery life) and are less customizable than I desire.
Here are the things I wanted to have:
- 100% portable—doesn't have to be plugged into mains electricity.
- Stable, custom exposure and color control (so the video doesn't flicker).
- Easy assembly of footage after the time-lapse is captured (to a gif or a video).
- Reliable timing (so I can calculate how many frames/how much time-warp factor to record).
So for starters, I made sure I had the right hardware on hand. I'll run through my parts list, then explain the setup process below.
Parts needed
- Raspberry Pi Zero W - $10
- MicroSD card (bigger is better—but read my comprehensive microSD benchmarks for some important caveats!)
- Pi Camera v2
- Pi Zero Camera connector cable
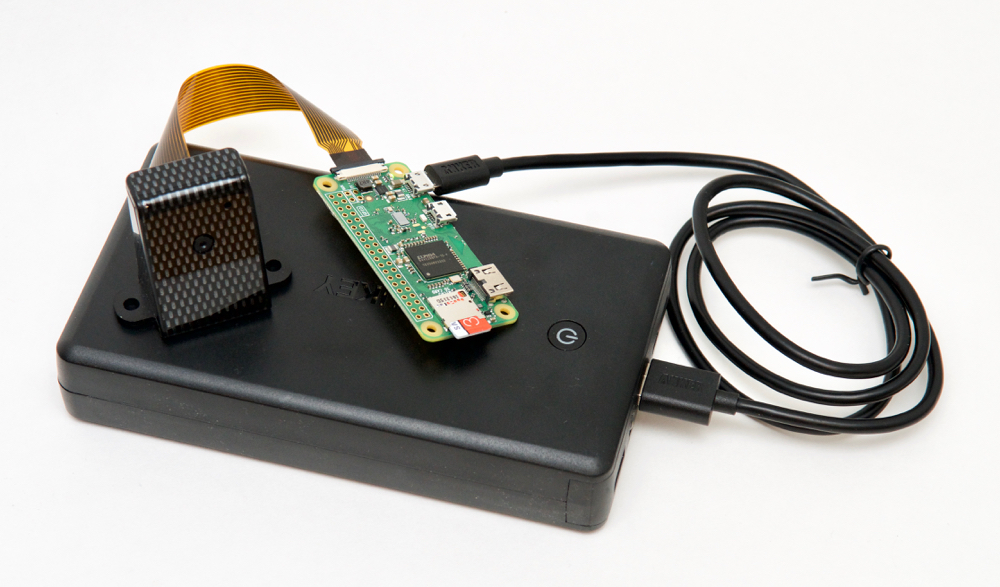
- USB battery power supply (I use the AUKEY 30,000 mAh power supply, but any rated at 10,000 mAh or more will go for days)
- (Optional) camera case (I like the one Adafruit sells, but any will do—helpful in rigging the camera, since it needs to be still!)
- Another computer to use to set things up and view the results
- A WiFi network (this allows the rig to be fully portable and remote-controllable)
Setting things up
I'll assume you're using a Mac for the setup process, but you can do the same thing on Windows if you use Ubuntu Bash or some other command line emulator that allows SSH access... and if you use Linux, you're golden—just pop open a Terminal window and follow along!
In this guide, we'll set up the Raspberry Pi headless—you don't need an extra monitor, keyboard, and mouse to plug into the Pi (nor do you need all the extra adapter cables to get it all hooked up!)
Put Raspbian on the microSD card
- Mount the microSD card (I use a microSD to SD adapter, then plug that into my USB SD card reader) on your Mac.
- Download Raspbian Lite (either as a .torrent or the direct .img download).
- Open Terminal, run
diskutil listto see all connected volumes. - Note the microSD card path (usually
/dev/disk2or/dev/disk3). - Unmount the microSD card:
diskutil unmountDisk /dev/disk2 - Write the image you downloaded to the card:
sudo dd if=~/Downloads/2017-03-02-raspbian-jessie-lite.img of=/dev/rdisk2 bs=1m(should take a minute or less if you have a decent microSD card)
Initialize SSH and WiFi configuration.
-
Open the
bootvolume on your Mac (should auto mount after the disk image is finished writing). -
Create an
sshfile to tell the Pi to enable SSH when it boots up by default:touch /Volumes/boot/ssh -
Create a
wpa_supplicant.conffile to tell the Pi to connect to your WiFi network on boot. Create a new file with that title in thebootvolume, with the contents below:network={ ssid="YOUR_SSID" psk="YOUR_PASSWORD" key_mgmt=WPA-PSK } -
Eject the microSD card, and stick it in the Raspberry Pi.
At this point, the Pi is fresh and new, and will boot up and connect to your WiFi network, allowing you to administer it via SSH.
Connect to the Pi
Assuming your WiFi network uses DHCP to assign IP addresses to devices (this is almost universally true), you need to figure out the IP address your Pi acquired when it booted. Use one of the following two options:
# Use nmap.
$ sudo nmap -sP 10.0.1.1/24

# Use Fing.
$ brew install fing
$ sudo fing 10.0.1.1/24
(Note: Check your computer's local network IP address—if it's something like 192.168.0.x, then you need to use 192.168.0.1/24 instead of 10.0.1.1/24.)
Either of these options will scan the network for a bit, then output a list of Host addresses and MAC/Hardware addresses. nmap additionally prints human-readable manufacturer labels, so it's even easier to identify devices labeled with (Raspberry Pi Foundation) on your network!
Once you have found the Pi's IP address, log into it: ssh pi@[IP-ADDRESS-HERE] (the default password is raspberry). Since this is the first time the Pi is being used, it needs to be configured:
sudo raspi-config- Set a new password (first option in the list).
- Set a hostname (e.g.
pi-zero-timelapse). - Go to 'Interfacing Options', then 'Camera', then choose 'Yes' to enable the camera interface.
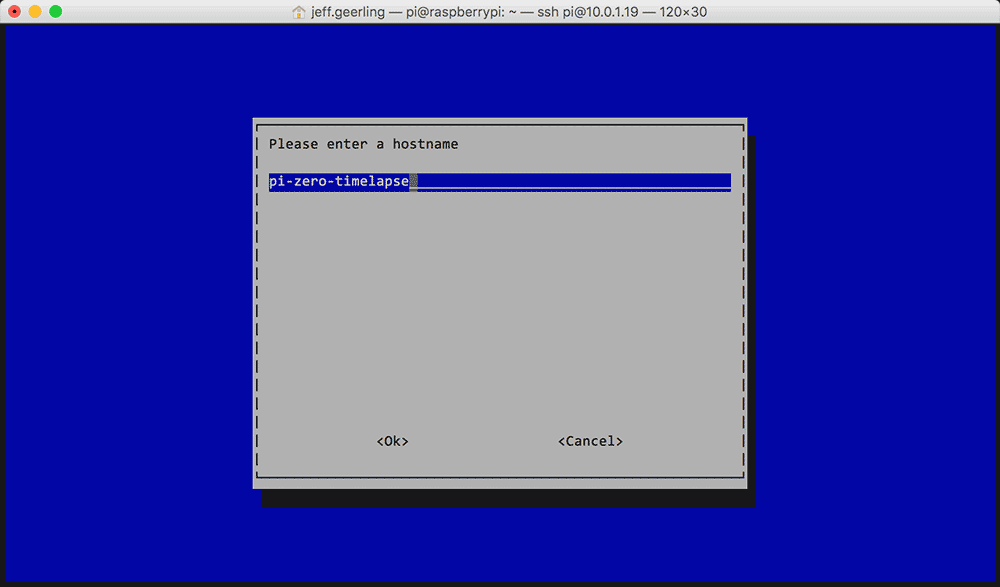
Aren't the graphics amazing?
Create your own Time Lapse script
Now that the Pi is set up, and you're connected to it, you need to install a few libraries so you can call them in your Python time-lapse script:
sudo apt-get install -y python-picamera python-yaml imagemagick
Then create a script named timelapse.py (nano timelapse.py to open it in the nano text editor), with the contents:
from picamera import PiCamera
camera = PiCamera() camera.capture('image.jpg')
This is basically how the guide in Raspberry Pi's official documentation works (Time-lapse animations with a Raspberry Pi). But at this point, we want to go a bit deeper, and have a more flexible way to control the timelapse—the length, the exposure settings, color temperature, etc.
To that end, I've built a little Python app (really, it's a glorified script... but nowadays everyone calls anything resembling software an 'App', so I might as well, too) that you can download from GitHub to have greater control over your time-lapses!
Going deeper
With the pi-timelapse app, you can build timelapses like the one at the top of this post pretty easily. Some of the features I've built so far include:
- Easy configuration via a
config.ymlfile - Resolution control
- Intervalometer control (number of images and interval between images)
- Ability to generate an animated gif or an mp4 video after capture is complete (experimental)
- Manual exposure control (optional): ISO, shutter speed, and white balance
Here's how to set things up:
- Change directories into the
piuser's home directory:cd ~(the tilde means 'home', which is/home/piin this case). - Download the project:
git clone https://github.com/geerlingguy/pi-timelapse.git - Change directories into the
pi-timelapsedirectory:cd pi-timelapse - Create your configuration file:
cp example.config.yml config.yml(this copies the example file toconfig.yml). - Configure the time-lapse:
nano config.yml(in the nano editor, Ctrl-O saves ('writes out') the file, and Ctrl-X exits). - Start a time-lapse:
python timelapse.py
After the number of frames you configured have been captured, there will be a folder named series-[date-and-time] in the directory with the pi-timelapse project. That directory contains all the images that were captured, numbered in a sequence like image00001.jpg, image00002.jpg, etc. And if you configured a gif or video to be created, then you'll see a .gif and/or .m4v video in the pi-timelapse project directory too.
You can use ls to display the contents of the directory, and cd [folder] to go into a folder, or cd .. to go back one directory.
At this point, if you want to view these things, you'll either need to use scp to copy a file from the Pi to your computer, or use an FTP client that works with SFTP (I use Transmit, but Cyberduck is a great, free alternative).
More Examples
Here's a video I shot at 1 frame every 15 seconds of cirrus clouds in the sky in front of my house:
And a shot of an earlier snow melting (as it was falling!) in my backyard:
And here's a gif I captured of myself, showing one of the risks of working at an adjustable-height standing desk:

I haven't had time to build any more elaborate time-lapses, mostly because they often take hours (or days!), depending on what I'm trying to capture, and I've still been honing the software in the short term.
Summary
Grab the Raspberry Pi Time-Lapse App from GitHub, and start making some time-lapses of your own!
My next steps are:
- Build a weatherproof enclosure that I can lock down to a post or otherwise secure outdoors, so I can record more of the nature around the house.
- Optimize the software so I can deliver videos directly to places like Dropbox or a network share (right now I have to SCP the files to my computer).
- Test other Pi models (Pi 3, Pi 2, etc.) to see how they fare in terms of power consumption vs. efficiency for shorter time-lapses.
And if you're interested in getting into the nitty-gritty, check out the contents of the timelapse.py script, and read the official picamera module documentation for a ton of useful background information.